

If you are considering joining the armed services,


Categories
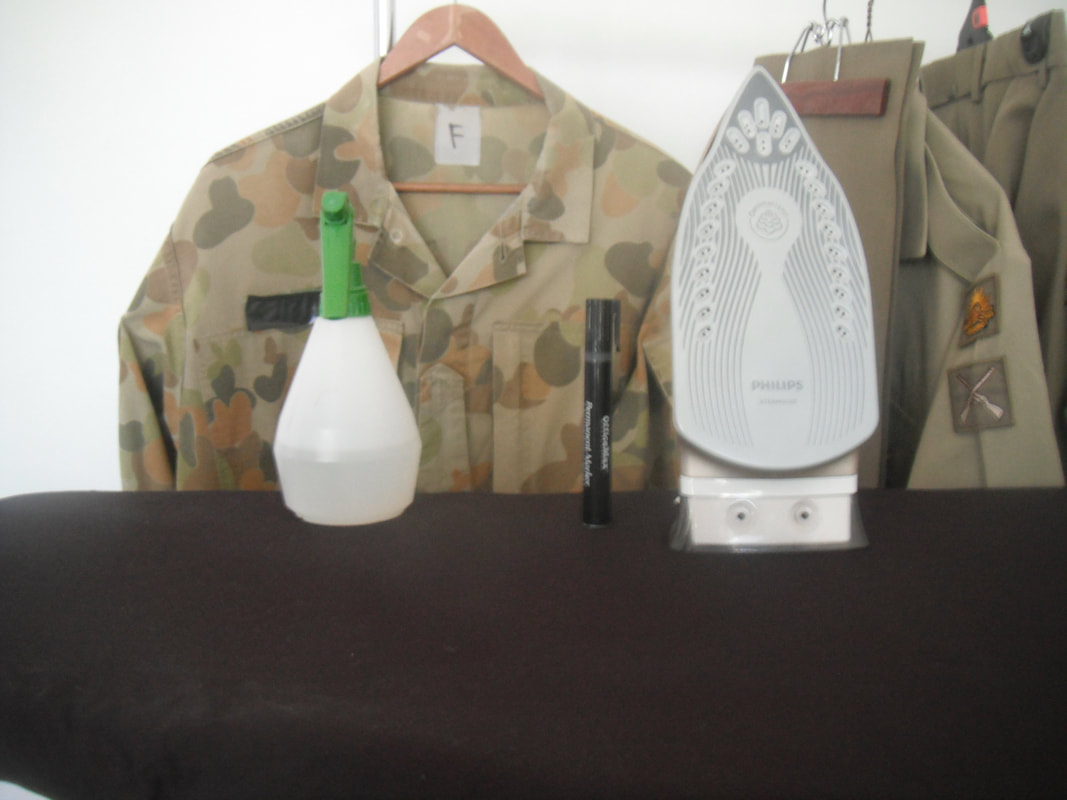
 How to set up an Ironing Station for Success Ok, so congratulations if you have just been notified by the recruiting office that you have been accepted to join the ADF or any other agency or place of employment that requires a high standard of dress. With your enlistment into the ADF, you have passed the first series of challenges; there will be plenty more. Not only will you be tested mentally and physically, you will also be required to function in sleep deprived states and in environments where normal people would stay indoors. Sure Ash I get that that and welcome the challenge, you might be thinking…..but what has that got to do with ironing? Well an important aspect of service life is looking sharp in uniform. Every time you place on a uniform you are representing yourself, the organization and in some cases the nation. Yourself – How you wear your uniform is quite simply a direct reflection of your personal qualities. First impressions are usually correct. If you look sharp you are positive and professional. Organization – adhering to all of the organizations dress requirements, not just the ones you could be bothered with, is a sign of professionalism. Nation – when wearing your uniform take a look down at your shoulder, you will see the national flag. Not everyone achieves representation of their country. Once you are in this position do not take it lightly. The first step is to apply yourself to wear the uniform in a manner befitting this representation.  Ok Ash thanks for that……..but what about ironing? Well, you are going to be wearing a uniform, several types more than likely and guess what, they all need ironing (some need polishing; more on that in later posts). So, where do you learn how to iron and who will teach you? Is it a skill you will learn at school? It depends on what school you went to, but usually no. Your parents? Maybe, if you bothered to ask or listen. Maybe they will teach you at recruit training? Sure, a 20-minute group lesson then you are let lose to craft your own ironing adventure. Not ideal. Warning! If you get it wrong there will be consequences. So, where do you learn how to iron and who will teach you? Short answer: Here and I will. I will step you through on the basics: the equipment you need, how to iron and all the hacks in between. I will provide links to other sites Pinterest etc to provide options and context to my explanations. It also allows transparency, so it is not just the world of ironing according to Ash. I would recommend viewing the you tube video I made on the subject (button below) and read through this blog in conjunction. It is a package deal. Added bonus with the You tube video; my daughter says if she has trouble sleeping, she just puts this on for a minute and she is out like a light (wise ass). The best advice I can give you is to watch the You Tube vid, read the blog and then put it into practice. Become the ironman/woman/chef of the household. Any long sleeve button up shirt is a perfect training aid. But don’t stop there iron anything in the house that needs it. During recruit training you may be required to iron Handkerchiefs, undershirts and other items you would never had known existed. You will be doing yourself a favor by mastering the skill BEFORE you arrive at recruit training. Another handy tip. If you can iron and iron well. There is a tremendous opportunity for you to help your fellow trainees. For example, you can iron a few items for them, if they in turn, help you out in other areas. Fostering teamwork. In later areas of service life, you may be able to charge a fee to iron someone’s dress uniform because they are too lazy or dysfunctional to do it themselves. Or even make a You Tube video or blog😉  Great Ash……. about the ironing? Gotcha. I will step through the process, provide my recommendations and summarize with links to websites for your own research. Step One – Selecting the ironing board and iron The main components of an ironing board are the board itself, the backing material, cover and any accessories:  Ironing Board: The size of an ironing board varies from Length 110cm and width of 30cm through to Length 155cm and width of 55cm. 1. I would recommend a length of 130cm and width of 45cm. This will allow room on the ironing board to properly lay the garments and to rest your iron and spray bottle when not in use. If the board moves around whilst you are ironing it will cause the garments to bunch and you will end up ironing wrinkles into the garment. If you are taller than 175cm secure a longer ironing board, so your trouser don’t hang off the end whilst ironing. 2. I recommend selecting a sturdy and stable board. Hint: The secret to ironing is to have a perfectly flat surface and garment. Backing material: There are generally two types of backing material used under the ironing board cover; foam and felt/Dacron. Foam is usually found on the cheaper boards and can be quite thin. Foam can deteriorate, due to heat and steam, and move around under the cover. Also, a thin layer does not prevent the backing of the board from impressing upon the garment and you will quite often iron wrinkles into the garment. 3. I recommend a thick layer of felt which is also wide enough to cover the sides of the ironing board. This ensures an even surface and also prevents any movement of the underlay as the ironing board cover is locking down the backing material. Ironing board cover: Ironing board covers are usually fastened to the board by one of the following methods: a. Full length elastic band. Least preferred as it does not generally hold a tight finish and loses tension over time. When I first started to iron, I rigged a system using safety pins and cord to apply tension on the cover. b. Hook and loop straps. Average to below average. I have found that these covers are needing an extra two or three straps to really lock the cover into place. c. String and stopper. Generally ok for providing a secure and tight cover. d. Interlocking elastic tension system. The best cover I have used (Fitzlikeaglove ironing board cover) and is featured in my You Tube video. This is not a sponsored review, simply my opinion. It is important that the cover is tight and fits well, covering all sides of the ironing board and backing material. I have not used a reflective or Teflon type cover before and I am interested in your opinion on their functionality. Please comment on this as it is of interest to me. 4. When replacing the cover ensure you measure your existing cover/board as there are many different sizes available. Accessories: Ironing boards may come with slide out iron holders, cord holders, line racks or even sleeve holders. As demonstrated in the video my method of ironing is systematic and specific to clothing type and as such, I have set up my board to reflect this. I have removed the existing iron holder and use the board, ground or other equipment to hold my iron or spray bottle when not in use.  Spray bottle (atomizer): This is an important item when ironing uniforms. Steam itself will not always blast the wrinkles away, at times you will need a quick spray of water directly on to the stubborn area followed by a hit by the steam iron; wrinkles gone. Equally important when ironing dress uniforms and building razor-like creases a spray bottle with a starch solution is a must. Starch: An absolute necessity in obtaining cutting edge creases. I prefer using the starch solutions rather than the aerosol products. When I say solutions, I am referring to the brands that are in a liquid or powder form. These are becoming more and more difficult to find. Once again, not being paid for mentioning these brands; if you find any where that sells Pearson or Silver Star Starch please let me know. In the video I use Mary Ellen’s starch mint variety which I found to be very good at holding creases (see my other videos) and also provided some aroma therapy; some really nice scents where wafting through the air.  Thread remover: Lighter, nail clipper or nail scissors. These can all be used to remove threads from your uniforms. It is a good procedure to set; remove the threads as you see them during ironing. If you leave it till later, later never comes. There will always be some threads on your uniforms, especially when they are new. Always have a thread remover on hand whilst ironing. Permanent Marker pen Your uniform and most of your equipment is generic. It looks very much like the persons next to you. Marking your equipment is essential in identifying your kit and is a positive step in preventing mix ups, lost gear and theft. Name and mark your uniforms on the tags provided and/or on the inside of a double seam. If you do not mark on a double seam there is a possibility that the ink will show through to the other side. You don’t want that. Not only is your name important but also numbering your uniform sets, especially your cams. Using a number or letter system to identify a set means you will always have a set of cams that are worn and washed as a set. For example, you mark a set of cam trousers and shirt, with your name and set identifier e.g. Lockyer 1. Whenever you wash and iron a set always match the identifiers and you will always have a matching set. It really does stand out when you wear a new shirt with faded trousers. It just doesn’t look right. After a few washes go over the name and identifier with a pen to ensure it doesn’t fade away. My recommendation: Always mark you sets.  In this case the set identifier is a letter "F". Garment specific hangers After you have completed ironing always hang your uniform on specific hangers. Most people hang their cam uniform on one coat hanger. This is fine if you are wearing the uniform the next day; however, after a few days the coat hanger WILL leave a noticeable line across your trousers. My recommendations: Use a sturdy hanger for your shirt. Use a specific trouser hanger If you are not wearing them for a while. Use a suit protector when transporting to mitigate dirt and security concerns.
Iron: For a long time, a simply used a good quality steam iron. I graduated to a good quality iron after being consistently let down by low quality products. The steam iron was good; however, the steam station is brilliant. I use a Philips Steam station. I do a lot of ironing and the steam generator iron is perfect for my requirements. It also has the ability to generate steam in the vertical position which allows the touch up of garments on a hanger. Be sure to use filtered or boiled water if you are in an area where the local water is hard. Most steam generators will have some sort of decalcifying function. By using filtered water, you will minimize the use of this function allowing you to breeze through the ironing with minimal delays. You do not have to buy the most expensive steam station and they really do cut down on the time required to iron a garment. It is difficult to travel with a steam station though so a smaller good quality steam iron may be required if you are moving around a lot. My recommendations: Use a steam station. You won’t look back.
Conclusion – A solid ironing board not the cheapest and not the most expensive. It requires a steady foundation and access to all parts of the board. You may find a cheap sturdy board will have cheap foam backing and a so-so cover. Upgrade these items and you have a good foundation. - A thick felt backing is important to prevent the pattern of the metal impressing upon the ironed garment. - Spray bottle It is a must have. - Starch; takes the finish to next level. Pearson's starch, if you can ever find it, is very good. - Always mark your sets. - Use specific hangers. -If you are performing a lot of ironing use a steam station. Links for further research: Ironing boards: All the large department stores & Bunnings stock ironing board, physically inspect them and upgrade where necessary.  Ironing board covers:
Fitz Like A Glove Ironing Board Cover: https://www.interfaceaustralia.com/wordpress/ Sewroo: https://www.sewroo.com.au/ https://www.catch.com.au/ Iron: Different reviews and summaries. Some of the review sites are affiliated to Amazon; however, it does give you some background of what you should look for in an iron and will enable to shop around. https://muchneeded.com/best-steam-irons/ https://bestreviews.com/top-steam-irons https://www.productreview.com.au/c/irons-steam-generators If you don’t mind subscribing to Choice, they offer excellent reviews on all types of products; you will need to pay for this service. https://www.choice.com.au/home-and-living/laundry-and-cleaning/ironing/review-and-compare/steam-stations Starch: I bought the Mary Ellen brand through eBay. If any one can track down Pearson's or Silver Star starch please let me know. Thanks for reading. Once you have set yourself up with a robust and functional ironing system you can begin to iron away. Ironing of uniforms is explained and demonstrated in my YouTube videos and accompanying blogs. This Blog is open for discussion. Thanks for your time. I look forward to your comments and questions. Regards Ash
2 Comments
|
AuthorAsh from Ash Applications, Military Professional 30 years experience. Here to guide your professional development. how-to-set-up-an-ironing-station-for-success.htmlClick to set custom HTML
|


 RSS Feed